
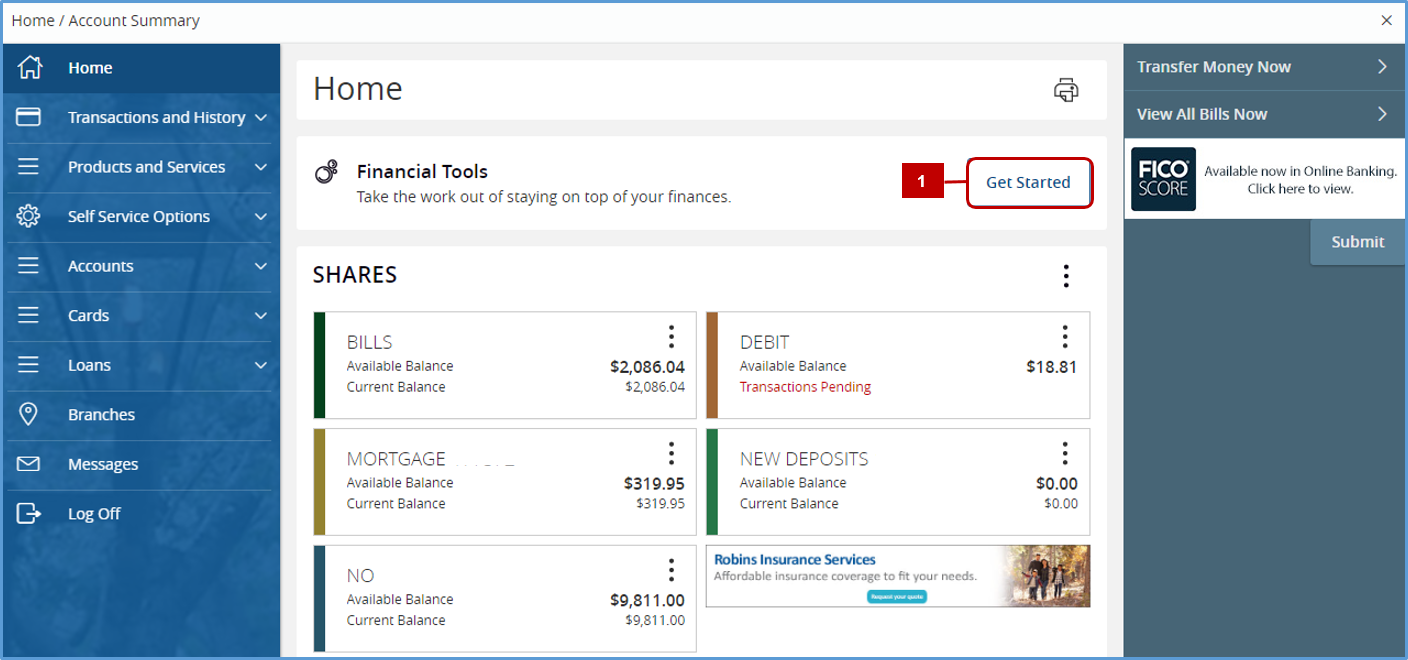
Financial Tools is a system that allows you to budget and manage your finances by aggregating (linking) your accounts across multiple financial institutions.
First Time Enrollment
- Select the Get Started button in the middle of the homepage of Digital Banking.
![step-1]()
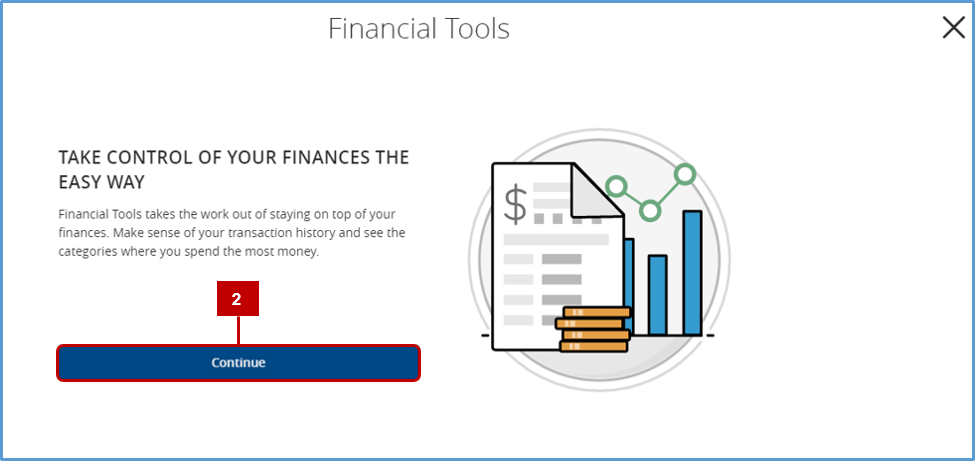
- Select Continue to move past the introduction screen.
![step-2]()
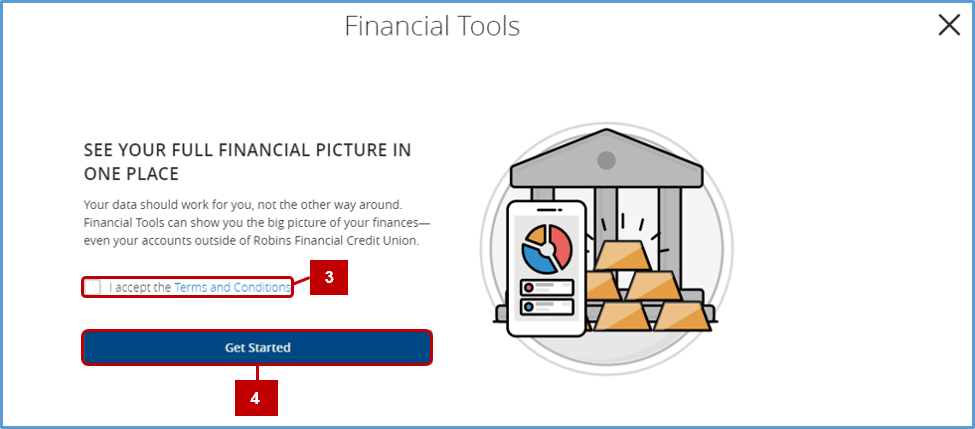
- Select Terms and Conditions and they will appear on a separate screen.
Once reviewed, check the box next to I accept the Terms and Conditions. - Select Get Started to continue.
![step-3-4]()
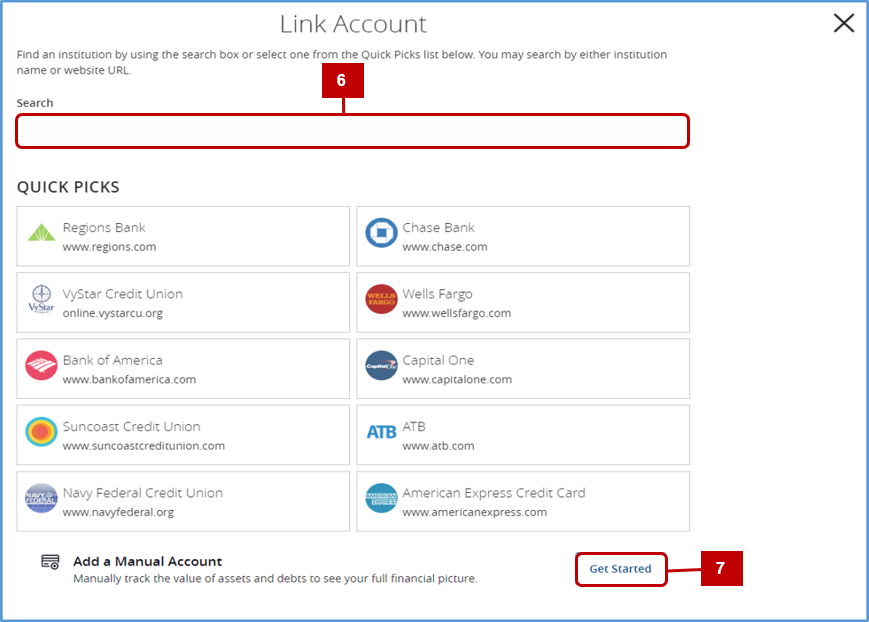
- The Link Account page will appear, see image for 6 and 7, to select which institution to link within Financial Tools.
- If an institution doesn’t appear on the main page, use the search bar to look it up.
- There is also an option to manually add accounts. Select Get Started to walk through the process.
![step-5-6-7]()
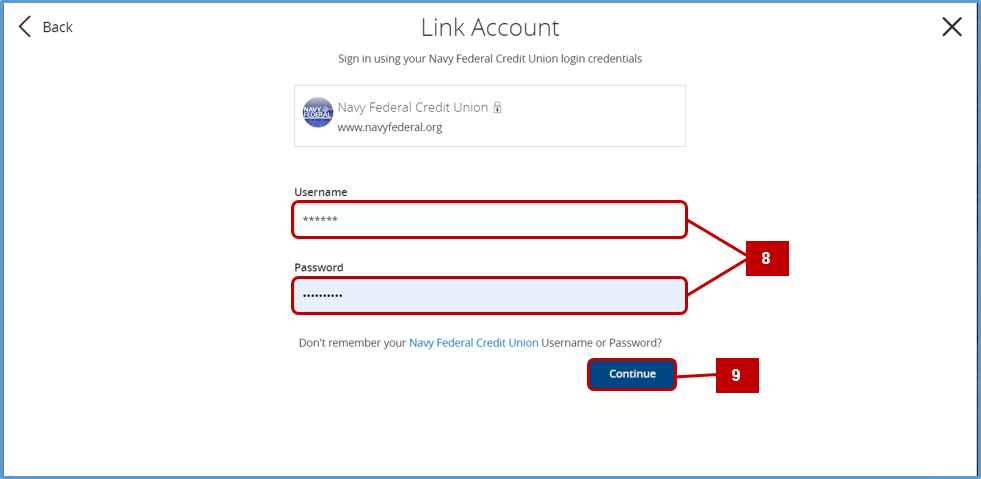
- A prompt will appear to enter the external financial institution’s Digital Banking login credentials.
- Select Continue.
![step-8-9]()
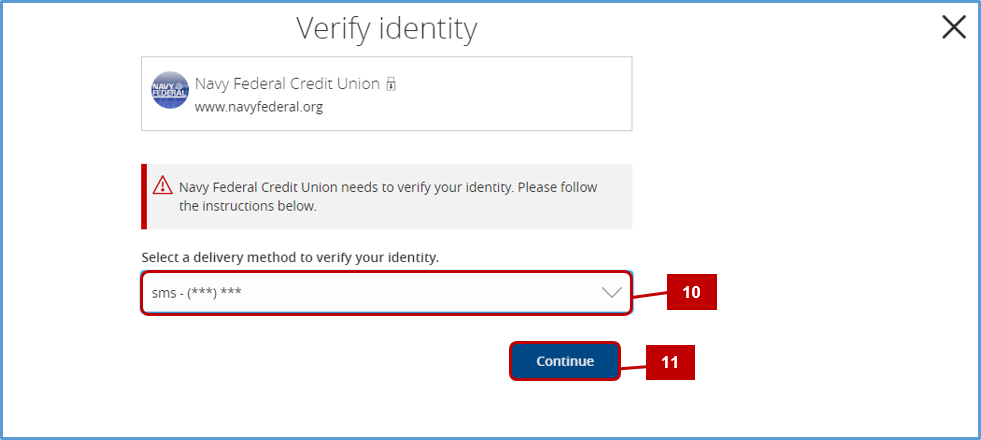
- Once the external financial institution’s credentials have been entered, a prompted will appear to select a delivery method to send a security code via phone.
- Select Continue.
![step-10-11]()
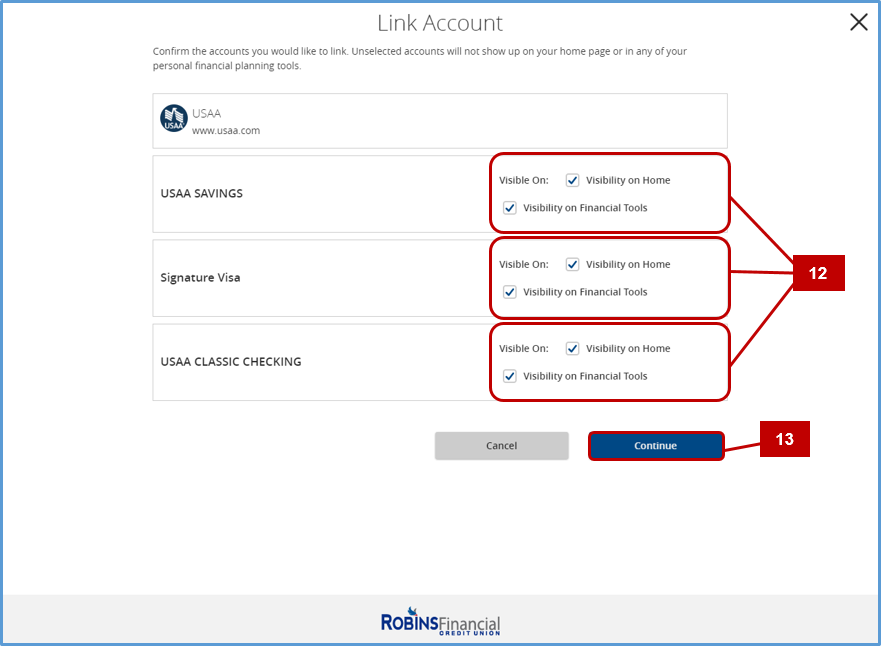
- After the security code has been entered, the option to decide what accounts will be displayed on the homepage as well as in Financial Tools.
- After the selection has been made, select Continue.
![step-12-13-2]()
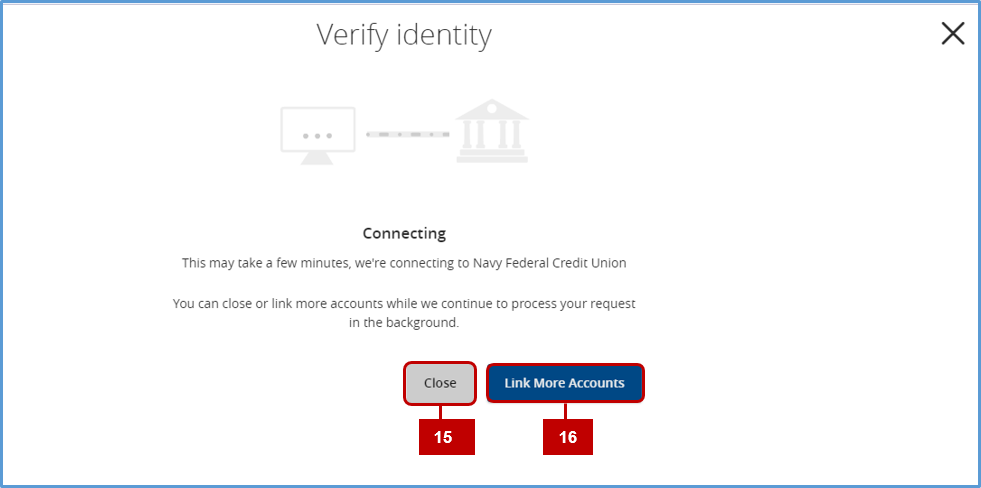
- A verification screen will pop up, see image for 15 and 16, as the connection is established.
- There will be an option to close the window while verification happens in the background.
- Select Link More Accounts to continue adding accounts to Financial Tools.
![step-14-15-16]()
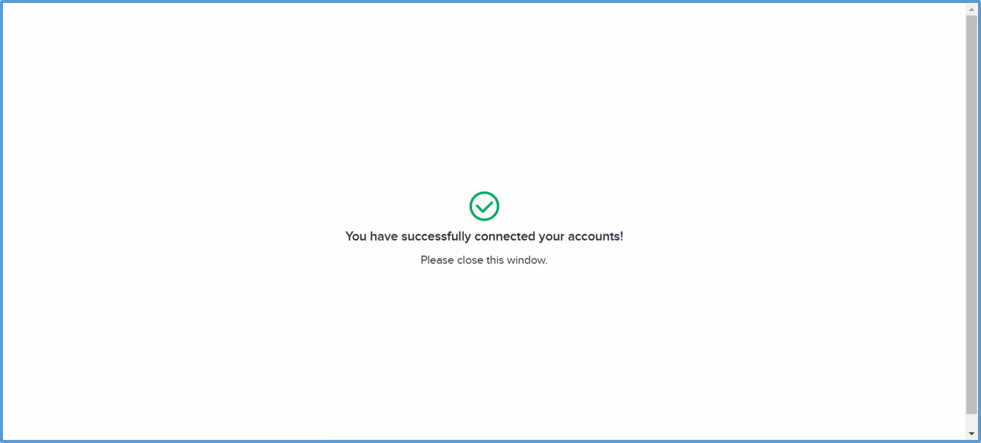
- Once the account has been linked, a confirmation notice will appear.
![step-17-2]()
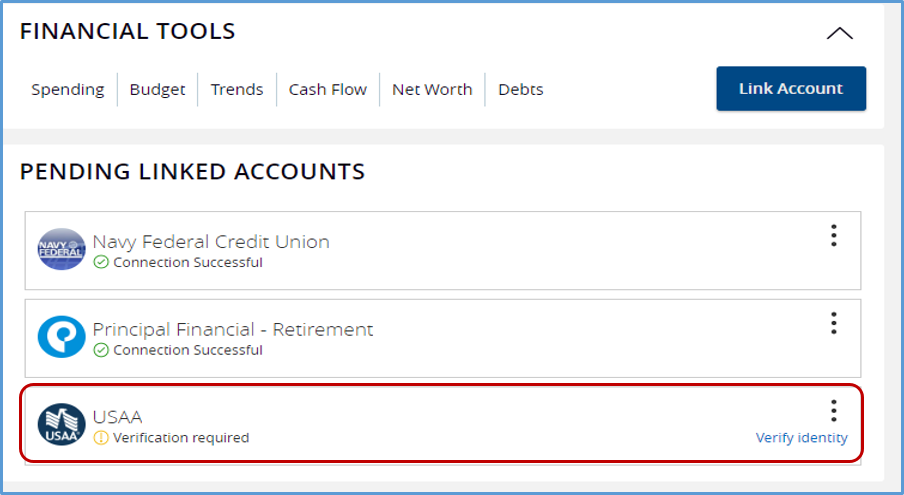
- If the window was closed the status of the linked account will appear on the home page.
![step-pending-linked-account-step-2]()
Features
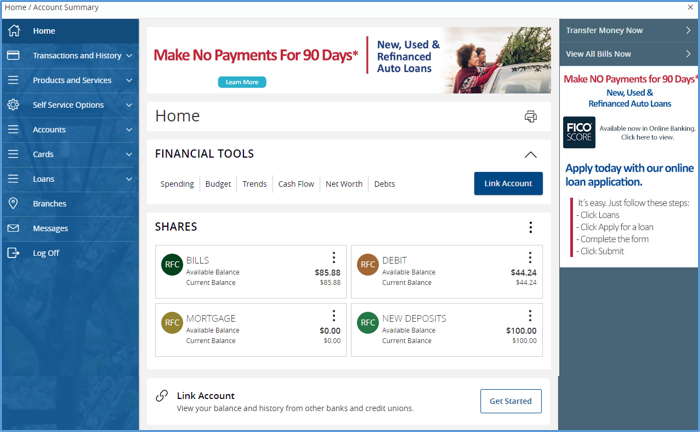
- After enrollment Account Summary page will appear as below.
![account-summary-page]()
Spending
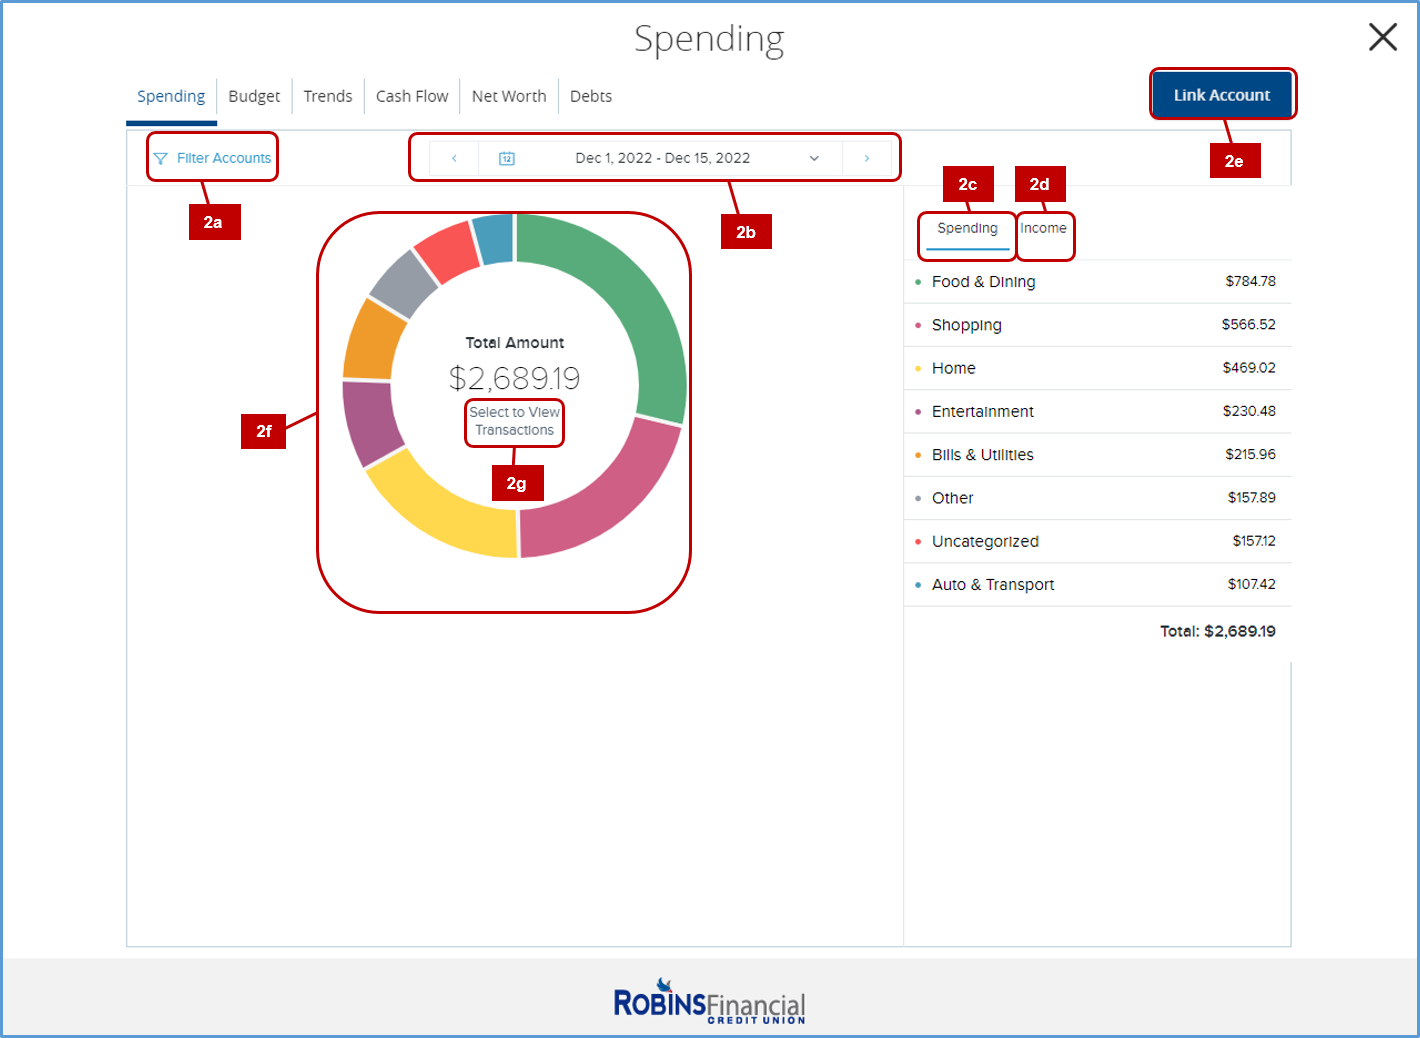
- Spending – displays all of the existing categories of spending for the time period displayed.
- Filter Accounts – filters out any account added to Financial Tools.
- Date Range – narrows/broadens the tracking time frame.
- Spending Tab – lists all spending categories and the amounts applied to them.
- Income – lists all sources of income and the amounts applied to them.
- Link Account – adds new external financial institutions to Financial Tools.
- Pie Graph – indicates all spending or income categories depending on which tab selected. Selecting each section of the pie graph will show the amount associated with it.
- Select to View Transactions – shows all transactions indicated in the pie graph.
![sending-ft-a-g2]()
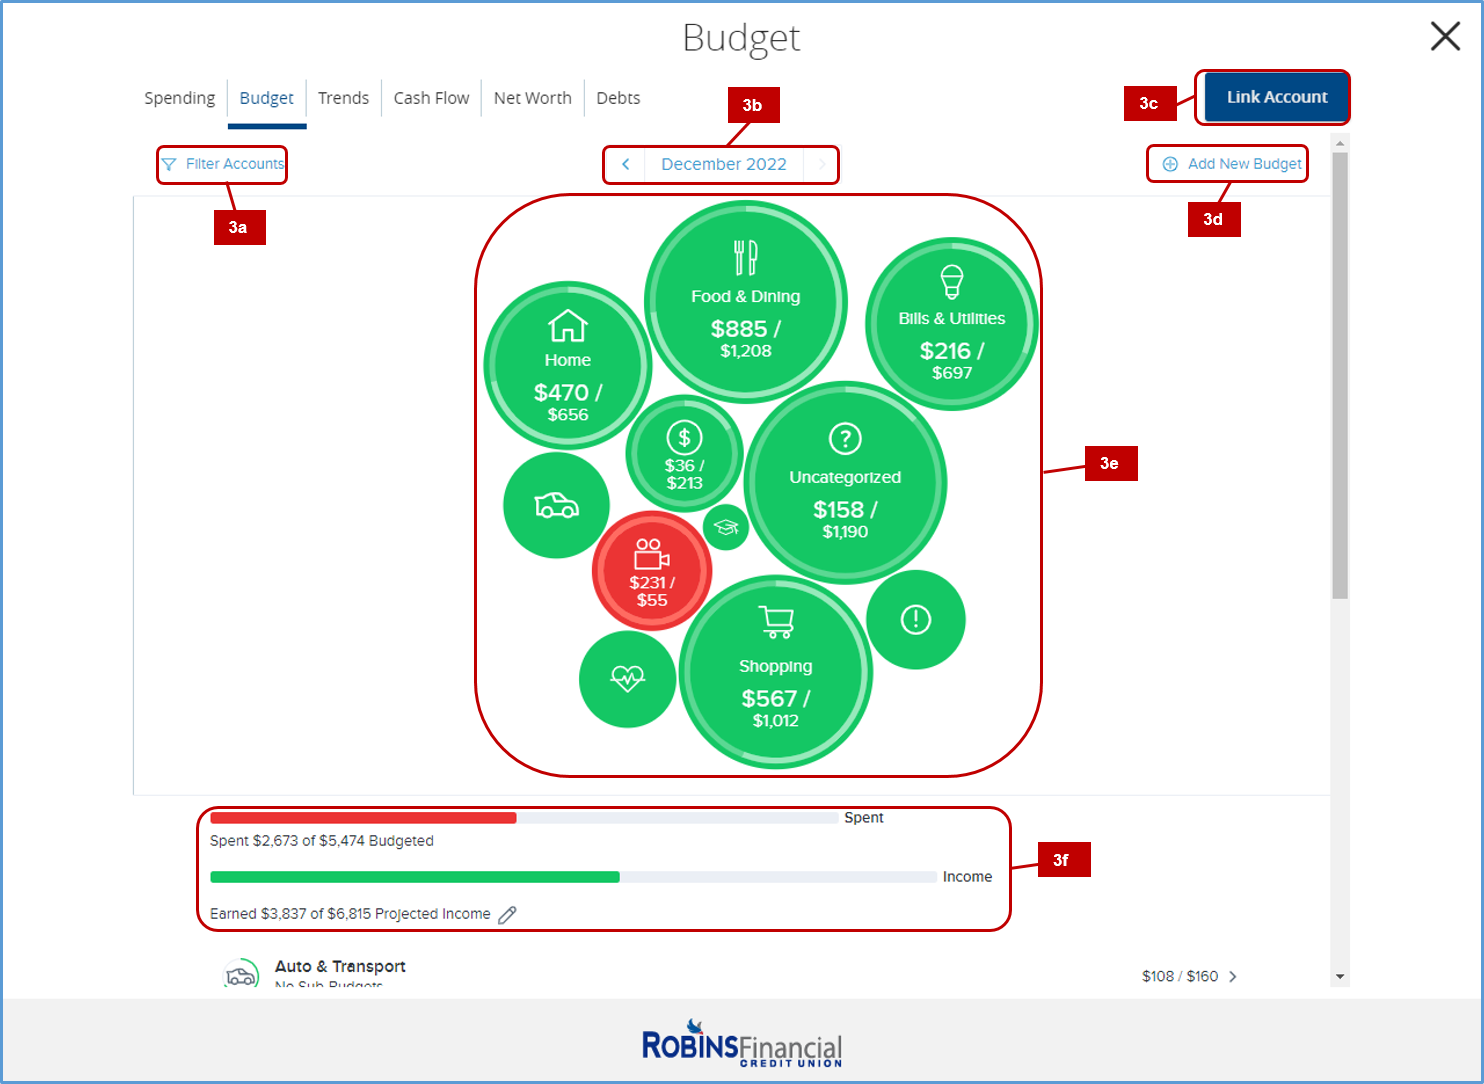
Budget
- Budget – offers two options for generating a new budget, the first is system generated from the past few month’s-worth of date (the more complete and correctly categorized when the budget is generated, the more accurate the results will be.) The second it manually created budget line items the member wishes to track. Once a budget is created the bubbles represent the relative size of the categories and the colors indicate how actual spending is tracking compared to the indicated target budget.
- Filter Accounts – filters out any account added to the Financial Tools.
- Monthly Range – narrows tracking time frame by month.
- Link Account – adds new external financial institutions to Financial Tools.
- Add New Budget – adds new budget items and the ability to recalculate the Budget.
- Budget Bubbles – displays all budget categories and can be selected individually.
- Bar Graph – displays the amount spent to the amount of income.
- Below the bar graph are a list of the budget catergories.
![budget-ft-a-f]()
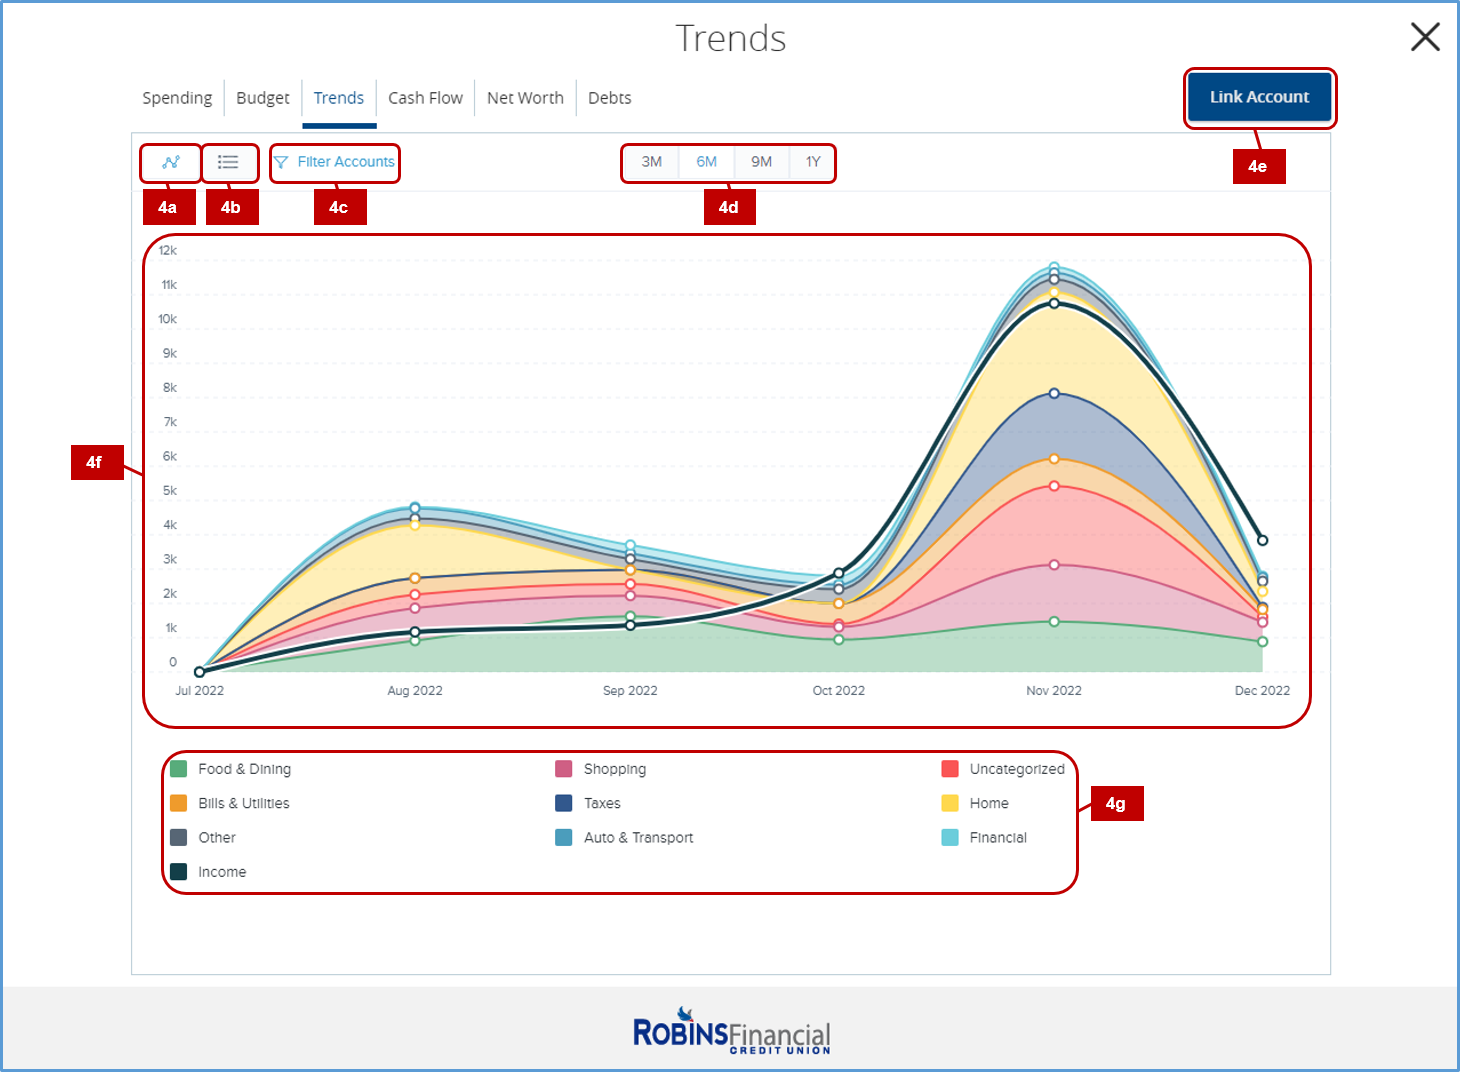
Trends
- Trends – an overview of spending trends over a period of time. Helps with tracking a particular category of spending, such as eating out, and wants a high-level view of the impact of their efforts.
![line-graph-ft]() – displays the Trends in a line graph.
– displays the Trends in a line graph.![list-ft]() – displays the Trends in a list.
– displays the Trends in a list.- Filter Accounts – filters out any account added to the Financial Tools.
- Date Range – narrows tracking time frame by 3 months, 6 months, 9 months, and 1 year.
- Link Account – adds new external financial institutions to Financial Tools.
- Graph – displays either a line graph or list of Trends
- Graph Key – indicates what trend goes with which line.
![trends-ft]()
Cash Flow
- Cash Flow – displays indicated trends past, present, and predicted future transactions/amounts.
- Link Account – adds new external financial institutions to Financial Tools.
![cash-flow-ft]()
- Link Account – adds new external financial institutions to Financial Tools.

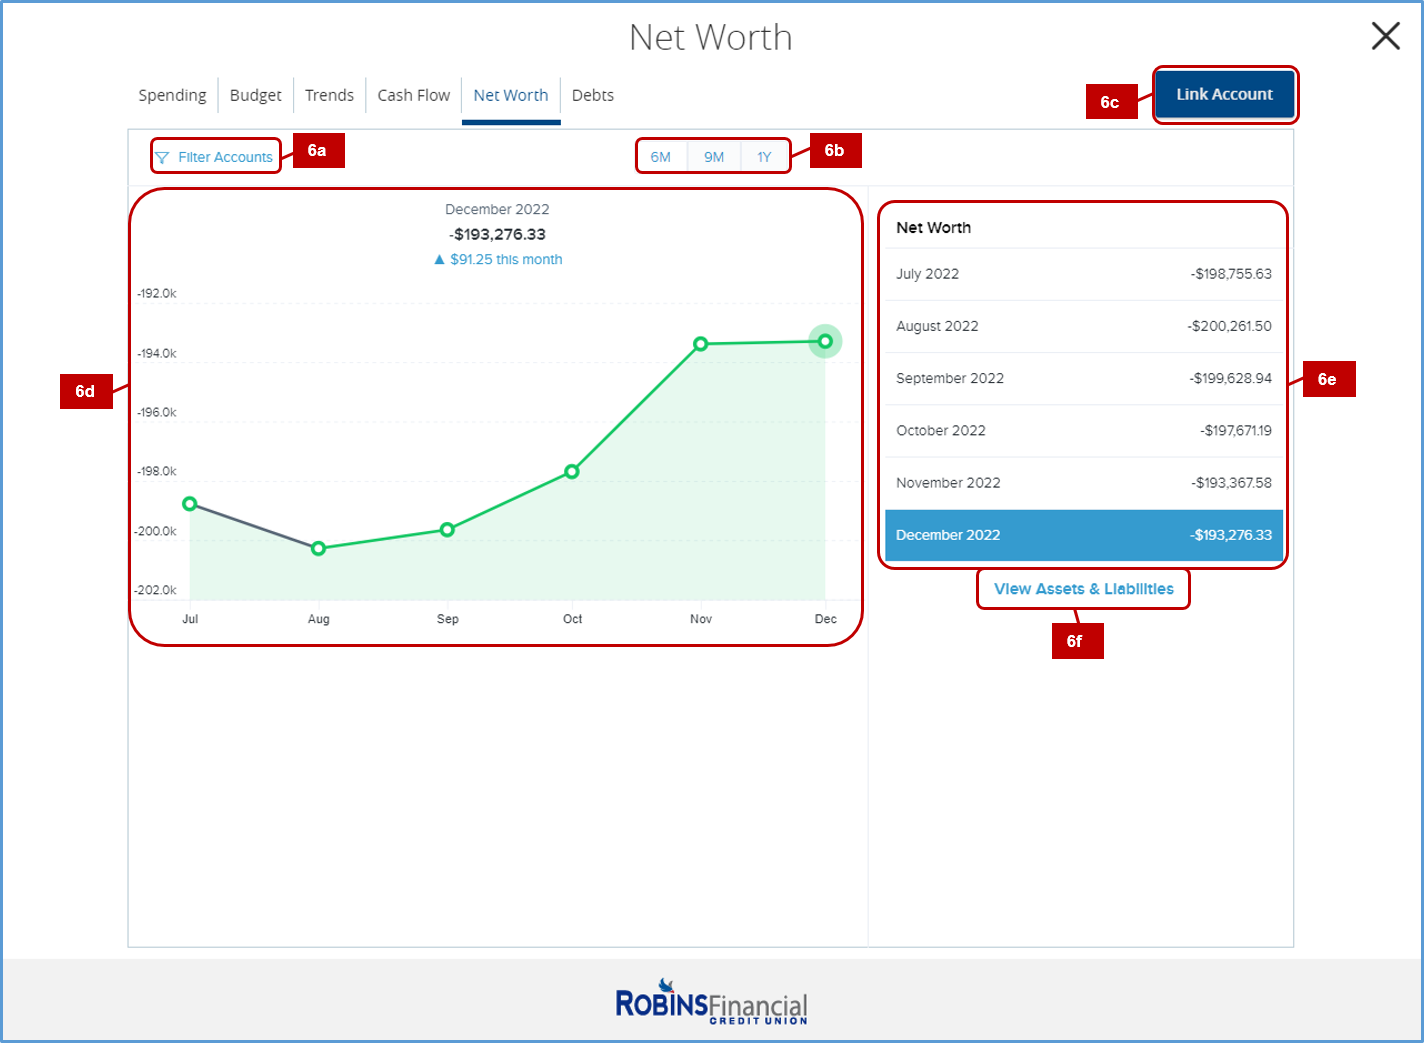
Net Worth
- Net Worth – tracks a members net worth over time based on the information within Financial Tools. At the bottom it displays the net difference from the previous month. A breakdown of assets and liabilities is also available within this feature.
- Filter Accounts – filters out any account added to the Financial Tools.
- Date Range – narrows tracking time frame by 6 months, 9 months, and 1 year.
- Link Account – adds new external financial institutions to Financial Tools.
- Line Graph – displays Net Worth trend filtered by the selection made in the Date Range.
- Monthly List – displays previous months Net Worth.
- View Assets & Liabilities – displays a break down of Net Worth.
![net-worth]()
Debts
- Debts – displays a list of liabilities in Financial Tools in one central view. Financial Tools uses the information available to calculate the payoff date of all liability accounts.
- Payment Plan drop down – allows modification to the payment plan between fastest payoff first, highest interest first, lowest balance first, and highest balance first.
- Filter Accounts – filters out any account added to the Financial Tools.
- Link Account – adds new external financial institutions to Financial Tools.
- Graph – displays the month and year of being debt free and explanation of each payment plan.
- List – displays all loans indicated in Financial Tools.
![debts-ft]()

Unlinking Accounts
- To unlink a previously linked account in Financial Tools, click on Options on the account you wish to unlink.
- Select Settings.
![]()
- Scroll down to the bottom of the Details & Settings page and select “Unlink all XYZ Accounts.”
![]()
- A confirmation screen will display, select “Yes, remove.”
![]()


Need more help with this?
Contact Us For More Help
Confidential - Robins Financial Credit Union
Powered by
Powered by